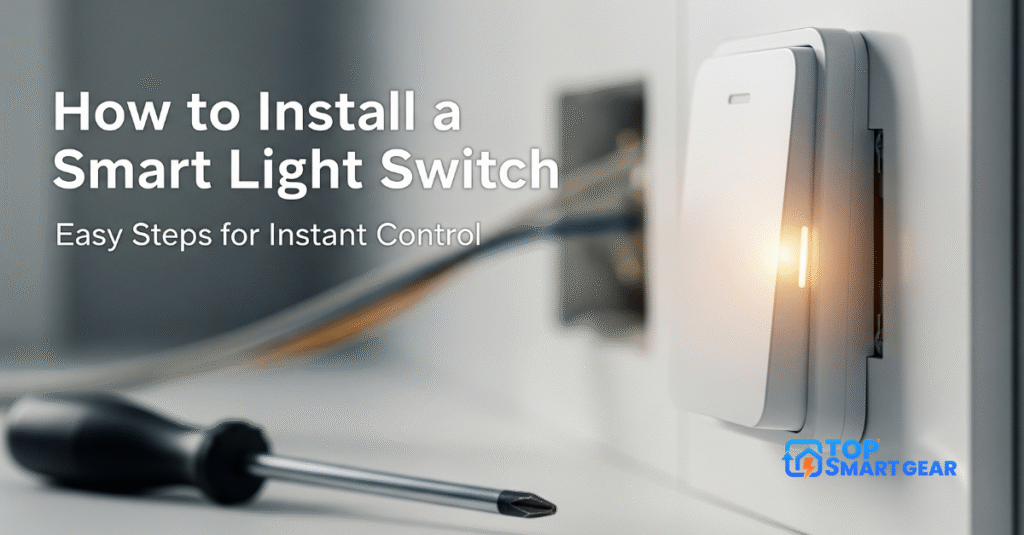
Are you ready to make your home smarter and more convenient? Learning how to install a smart light switch is easier than you think, and it can save you time, energy, and money.
Imagine controlling your lights with just a tap on your phone or even your voice. In this guide, you’ll learn simple, step-by-step instructions to install a smart light switch safely and quickly. Whether you’re a beginner or just want to avoid common mistakes, this article will help you transform your home lighting without stress.
Keep reading to discover how you can upgrade your space today!
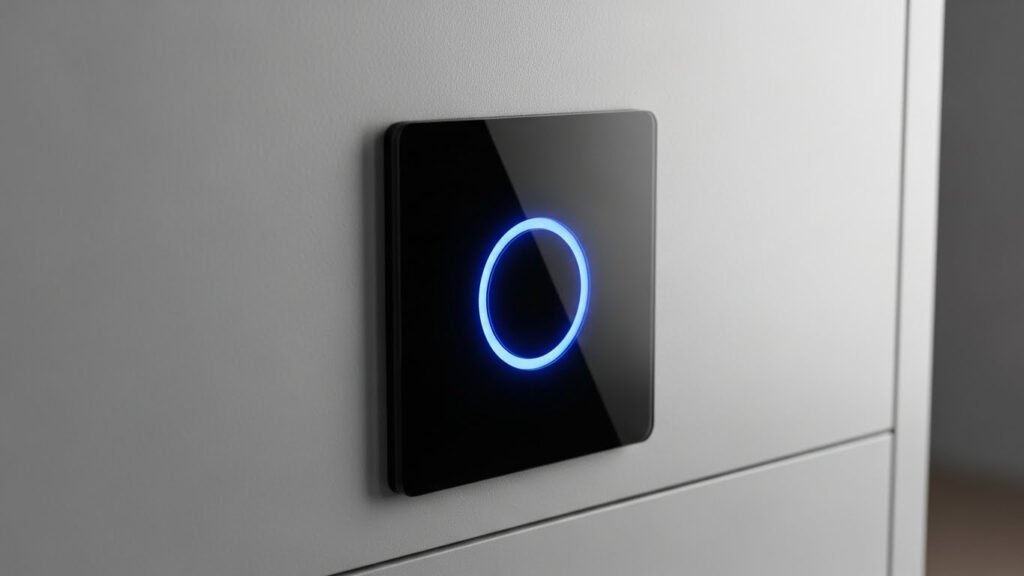
Choosing A Smart Switch
Choosing the right smart switch is a key step before installing a smart light switch. It affects how well the switch works with your home and how easy it is to use daily. Smart switches come in various types, work with different wiring setups, and offer many features. Understanding these points helps pick the best switch for your needs.
Types Of Smart Switches
Smart switches vary based on control style and installation. The main types include:
- Single-Pole Switches: Control one light or fixture from one location.
- 3-Way Switches: Control one light from two locations, like at the top and bottom of stairs.
- Dimmer Switches: Allow adjusting light brightness with smart control.
- Touch Switches: Use touch-sensitive panels instead of physical buttons.
- Switches with Motion Sensors: Automatically turn lights on or off when motion is detected.
Here is a simple table to compare common types:
| Switch Type | Control | Common Use |
|---|---|---|
| Single-Pole | One location | Simple rooms |
| 3-Way | Two locations | Hallways, stairs |
| Dimmer | Brightness control | Living rooms, bedrooms |
Choose the type that fits your room and light setup. Some homes need multiple smart switches for full control.
Compatibility With Home Wiring
Smart switches need to fit your home’s wiring to work correctly. Wiring types and power sources vary across houses.
Most smart switches require a neutral wire to power themselves even when the light is off. Many older homes lack this wire in the switch box. Check your wiring before buying.
Wiring basics to verify:
- Neutral Wire: Needed for most smart switches.
- Line and Load Wires: Connect power source and light fixture.
- Ground Wire: For safety, usually green or bare copper.
Some smart switches work without a neutral wire but may need special bulbs or may have limited features.
Use this checklist to match your wiring:
- Turn off power and open switch box.
- Look for a bundle of white wires (neutral).
- Identify black wires (line/load).
- Note ground wire presence.
Consult an electrician if unsure about wiring types. Wrong installation risks damage or safety hazards.
Features To Consider
Smart switches offer many features. Pick those that improve comfort and suit your lifestyle.
Important features include:
- Voice Control: Works with Alexa, Google Assistant, or Siri.
- App Control: Allows turning lights on/off from anywhere.
- Scheduling: Set timers or routines for lights.
- Energy Monitoring: Track electricity use of lights.
- Scene Setting: Control multiple lights with one command.
- Compatibility: Works with smart home hubs or platforms.
Also, consider the switch design and ease of use. Some have LED indicators or customizable buttons.
Use this simple table to compare features:
| Feature | Benefit |
|---|---|
| Voice Control | Hands-free operation |
| App Control | Remote access |
| Scheduling | Automatic light management |
| Energy Monitoring | Save on electricity bills |
Pick features that match your daily habits. Avoid paying for extras you won’t use.
Tools And Materials Needed
Installing a smart light switch requires the right tools and materials to ensure a smooth, safe installation. When learning how to install a smart light switch, preparing everything beforehand saves time and reduces frustration. This section lists the essential items you need to replace your traditional switch with a smart one. Knowing these tools and materials helps you work efficiently and safely.
Essential Tools
Several basic tools are required to install a smart light switch. These tools help you remove the old switch, connect wires, and secure the new device in place. Having them ready avoids delays and mistakes during installation.
- Voltage Tester: Checks if the power is off before touching wires.
- Screwdrivers: Both flathead and Phillips head are needed to remove and install screws.
- Wire Strippers: Used to strip insulation from wires for proper connections.
- Needle-Nose Pliers: Helpful for bending and twisting wires.
- Electrical Tape: Insulates wire connections safely.
- Drill (optional): Useful if new holes are needed for mounting the switch.
| Tool | Purpose |
|---|---|
| Voltage Tester | Ensures power is off before starting work |
| Screwdrivers | Remove and secure switch screws |
| Wire Strippers | Strip wire insulation |
| Needle-Nose Pliers | Bend and twist wires |
| Electrical Tape | Insulate wire connections |
| Drill | Make holes if necessary |
Having these tools ready makes the installation faster and safer. Missing even one can cause delays or unsafe wiring.
Safety Gear
Safety is critical when working with electricity. Wearing the right gear protects against shocks and injuries. Never skip this step, even for small jobs.
- Insulated Gloves: Protect your hands from electric shocks.
- Safety Glasses: Shield your eyes from sparks or debris.
- Non-slip Shoes: Help avoid slipping while working on ladders or floors.
- Flashlight or Headlamp: Provides clear visibility in dark switch boxes or rooms.
Always turn off the power at the circuit breaker before starting. Use a voltage tester to double-check. Wear insulated gloves and glasses during installation. Avoid wearing metal jewelry or rings. Work in a well-lit, dry area. These precautions significantly reduce the risk of accidents.
| Safety Gear | Reason |
|---|---|
| Insulated Gloves | Prevent electric shock |
| Safety Glasses | Protect eyes from sparks |
| Non-slip Shoes | Prevent slipping and falling |
| Flashlight/Headlamp | Improve visibility in low light |
Additional Materials
Besides tools and safety gear, some extra materials help with the installation or improve the setup. These materials ensure a neat and functional smart switch.
- Smart Light Switch Kit: Includes the new switch and mounting hardware.
- Wire Nuts: Secure wire connections safely.
- Wall Plate: Covers the switch and hides wires.
- Cable Labels: Mark wires for easy identification.
- Smartphone or Tablet: Needed for the switch’s app setup and control.
Check your smart switch kit to see if it includes wire nuts and wall plates. Buy extra if needed—label wires before disconnecting to avoid confusion. A smartphone or tablet is crucial for connecting the switch to Wi-Fi and for customizing settings.
| Material | Purpose |
|---|---|
| Smart Light Switch Kit | New switch and mounting parts |
| Wire Nuts | Safe wire connections |
| Wall Plate | Cover switch and wires |
| Cable Labels | Mark and identify wires |
| Smartphone/Tablet | Set up and control the switch |
Preparing For Installation
Installing a smart light switch requires careful preparation to ensure safety and a smooth setup. Preparing for installation involves steps that protect both you and your home. Before starting, gather all necessary tools and familiarize yourself with your electrical system. This guide explains the essential tasks for how to install a smart light switch correctly and safely.
Turning Off Power
Always start by turning off the power to the switch you plan to replace. This step prevents electric shocks and protects your home’s wiring. Follow these steps to turn off power safely:
- Locate your home’s circuit breaker panel.
- Identify the breaker controlling the switch’s circuit.
- Flip the breaker switch to the OFF position.
- Use a voltage tester to confirm that no power is flowing to the switch.
Why this matters: Working on live wires is dangerous. A voltage tester helps you double-check that the power is off before touching anything. If unsure about the breaker, turn off the main power switch to cut electricity to the whole house.
| Tool | Purpose |
|---|---|
| Voltage Tester | Confirms no live electricity at the switch |
| Flashlight | Provides light if power is off in the room |
| Insulated Gloves | Extra protection against electrical shock |
Never skip turning off the power or using a voltage tester. Safety comes first when learning how to install smart light switch.
Removing The Old Switch
After the power is off, remove the existing switch. This step clears the way for your new smart switch. Follow these instructions:
- Use a screwdriver to take off the switch plate cover.
- Unscrew the mounting screws holding the switch to the wall box.
- Carefully pull the switch out without touching the wires.
- Note how the wires connect to the old switch. Take a photo or label wires.
- Loosen the terminal screws to disconnect wires from the old switch.
Important tips: Handle wires gently to avoid damage. Keep screws and parts safe for later use. Do not remove wires from the wall box itself.
Removing the old switch prepares your setup for a smart switch. A clear understanding of wire connections helps the next steps go smoothly. This is key to installing a smart light switch without trouble.
Checking Wiring
Check the wires in the wall box to ensure they match your new smart switch needs. Smart switches often need a neutral wire, which older switches may lack. Follow these checks:
- Identify wires by color: typically black (hot), white (neutral), green or bare (ground).
- Look for a white neutral wire bundle in the box.
- Check wire condition: no frays or damage.
- Use a voltage tester to confirm wires are not live.
Wire color and function table:
| Wire Color | Function |
|---|---|
| Black | Hot wire (carries power) |
| White | Neutral wire (completes circuit) |
| Green or Bare Copper | Ground wire (safety) |
Without a neutral wire, some smart switches may not work. Check your switch’s instructions for compatibility. Calling an electrician is wise if wiring seems confusing or incomplete.
Proper wiring check is critical for how to install smart light switch safely and effectively. Confirm wires fit your new device before proceeding.

How to Install a Smart Light Switch
Installing a smart light switch requires careful attention to the wiring process. Wiring the smart switch correctly ensures safety and proper function of your new device. This step involves recognizing each wire’s role, connecting them to the switch, and securing everything in place. Follow each part closely to avoid common mistakes and enjoy the benefits of your smart switch without hassle.
Identifying Wires
Before starting smart switch wiring, identifying each wire in the electrical box is crucial. Most homes have standard wire colors, but double-checking is safest. Common wires include:
- Line (Live) wire: Usually black or red, carries power from the electrical panel.
- Load wire: Also black or red, connects to the light fixture.
- Neutral wire: Typically white, completes the electrical circuit.
- Ground wire: Green or bare copper, used for safety.
Use a voltage tester to confirm the line wire. This tool helps avoid shocks or wrong connections. Label each wire with masking tape for clarity.
| Wire Color | Purpose | Notes |
|---|---|---|
| Black or Red | Line / Load | Power source or switch to light |
| White | Neutral | Completes circuit |
| Green / Bare | Ground | Safety connection |
Understanding these wires helps ensure how to wire smart switch safely and correctly.
Connecting Wires To The Switch
After identifying wires, connect them to your smart switch carefully. Follow the instructions that come with your switch for best results. Most smart switches have terminals or wire nuts for connections.
Steps to connect wires:
- Turn off power at the circuit breaker to prevent electric shock.
- Connect the line wire from the wall to the switch’s line terminal.
- Attach the load wire from the light fixture to the load terminal.
- Connect the neutral wire to the neutral terminal or wire bundle.
- Attach the ground wire to the ground terminal or green screw.
Use wire nuts or terminal screws to secure each wire. Make sure no bare wire is exposed outside the connectors. Here’s a simple wiring guide:
| Smart Switch Terminal | Wire Color | Function |
|---|---|---|
| Line | Black or Red | Power input |
| Load | Black or Red | Power to light |
| Neutral | White | Completes circuit |
| Ground | Green or Bare | Safety grounding |
Double-check each connection before moving on. Proper connections prevent switch failure and electrical hazards.
Securing The Switch
Once wires are connected, secure the smart switch inside the electrical box. This step keeps wiring safe and the switch stable during use.
Follow these tips to secure your smart switch:
- Carefully fold the wires back into the box without bending or pinching them.
- Align the switch with the screw holes on the electrical box.
- Use the screws provided to fasten the switch firmly in place.
- Make sure the switch sits flush with the wall surface.
- Attach the faceplate to finish the installation.
A loose switch may cause wiring issues or damage over time. Tighten screws gently to avoid cracking the switch or wall plate.
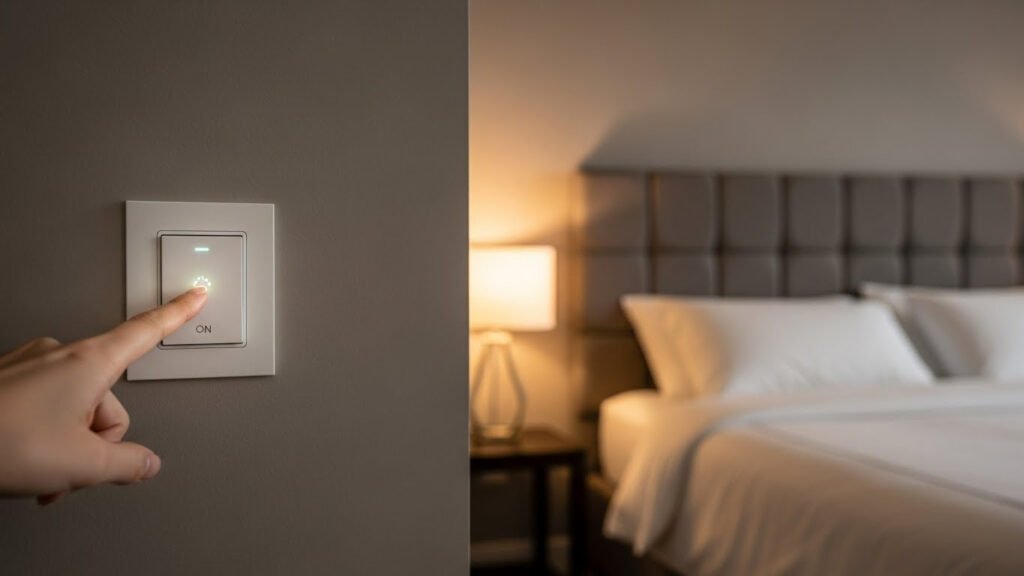
Finally, restore power at the breaker and test your new smart switch. Confirm the lights respond correctly before finishing the project.
Setting Up The Smart Switch
Setting up the smart switch is the next step after completing the physical installation. Knowing how to install a smart light switch includes not just wiring but also proper setup to ensure it works smoothly with your home’s electrical system and smart devices. A correct setup allows you to control your lights remotely and customize their behavior. Follow clear steps to restore power safely, connect your switch to a hub or app, and adjust its settings. These actions complete the smart switch installation process, making your home smarter and more convenient.
Restoring Power
After installing the smart switch, restoring power safely is crucial. First, return to your home’s circuit breaker panel. Switch the breaker you turned off for installation back to the ON position. This action powers the smart switch and the connected light fixture.
Follow these tips to restore power safely:
- Double-check all wire connections before turning on the power.
- Use a voltage tester to confirm power returns to the switch.
- Watch for any sparks or unusual smells; if noticed, turn off the power immediately.
Once power is restored, your smart switch should light up or show an indicator light. This signal means the switch is receiving power and is ready for setup. If the switch does not respond, switch off the breaker again and review your wiring connections. Correct any loose or incorrect wires, then restore power again.
| Step | Action | Tip |
|---|---|---|
| 1 | Go to the circuit breaker | Locate the switch for your light circuit |
| 2 | Turn breaker ON | Ensure no one touches the wiring |
| 3 | Test the switch | Look for lights or indicators |
Pairing With A Hub Or App
Pairing your smart switch with a hub or app is key to controlling it remotely. Most smart switches connect through Wi-Fi, Zigbee, or Z-Wave. Choose the right method based on your home’s setup.
Steps to pair your smart switch:
- Download the manufacturer’s app on your smartphone.
- Create an account or sign in if required.
- Open the app and select “Add Device” or “Pair New Switch.”
- Follow the on-screen instructions to connect the switch to your Wi-Fi or smart hub.
- Wait for the app to confirm a successful connection.
Keep these points in mind during pairing:
- Ensure your phone is close to the smart switch during setup.
- Use a stable Wi-Fi network with 2.4 GHz frequency for better range.
- Disable VPNs or proxies that may block the connection.
Pairing enables voice control via assistants like Alexa or Google Assistant. It also allows scheduling and remote light control through the app. This step is essential for smart switch installation to unlock the full benefits of a smart home.
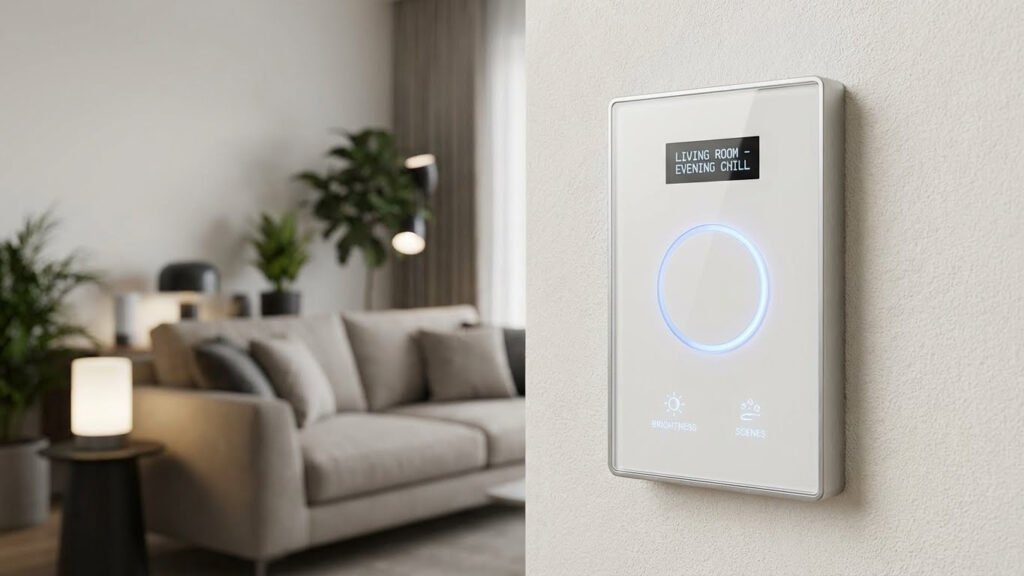
Configuring Settings
Configuring settings personalizes how your smart switch works. After pairing, open the app to adjust options. Settings vary by brand but often include:
- Schedule: Set timers for lights to turn on or off automatically.
- Brightness control: Adjust dimming levels if supported.
- Scenes: Create lighting moods for different times or activities.
- Notifications: Receive alerts if the switch is used unexpectedly.
- Device sharing: Allow family members to control the switch.
Use these tips for easy configuration:
- Start with basic schedules to save energy.
- Test dimming and scenes during different times of the day.
- Explore voice assistant settings for hands-free control.
- Update the app and switch to the latest firmware regularly to access new features.
Proper configuration completes the smart switch installation. It improves comfort, security, and energy efficiency in your home. Experiment with features to find what fits your lifestyle best.
Troubleshooting Common Issues
Troubleshooting common issues is an important step after How to Install a Smart Light Switch. Many users experience issues such as the switch not responding, connectivity errors, or flickering lights. These issues can be frustrating but are often easy to fix. This section covers the most frequent problems and clear solutions—so you can follow the Smart Switch Wiring Guide and Smart Switch App Configuration carefully to avoid errors. Understanding how to diagnose smart home lighting problems helps keep your system running smoothly. Let’s explore, step by step, how to handle the most common issues.
Switch Not Responding
A Smart Switch Not Responding is one of the most common issues. This problem means the switch does not react when you try to turn the light on or off, either physically or through the app. Troubleshooting Smart Switch starts with checking power and wiring. Follow these steps:
- Check the circuit breaker: Ensure the breaker controlling the switch is ON.
- Verify wiring connections: Loose or incorrect wires can cause failure. Use the Smart Switch Wiring Guide.
- Power cycle the switch: Turn off the power for 30 seconds, then turn it back on.
- Reset the switch: Follow the manufacturer’s instructions to reset the device.
- Test manual switch operation: Press the switch physically. If it still does not respond, the device may be faulty.
Here is a simple checklist to verify common causes:
| Issue | Possible Cause | Solution |
|---|---|---|
| Switch dead | No power supply | Check the breaker and wiring |
| Switch unresponsive | Firmware glitch | Reset or power cycle the switch |
| App control fails | Smart Switch Connectivity Issues | Reconfigure Smart Switch App |
Connectivity Problems
Smart Switch Connectivity Issues block the switch from communicating with your home network or app. This stops remote control and automation. Troubleshooting Smart Switch connectivity requires checking your Wi-Fi and app settings.
Steps to fix connectivity problems:
- Confirm Wi-Fi signal: Ensure the switch is in range of your router.
- Check router settings: Disable MAC filtering or parental controls that block devices.
- Update firmware: Use the Smart Switch App Configuration to check for updates.
- Re-add the device: Remove and then add the switch again in the app.
- Restart router: Power cycle your router to refresh the connection.
Common causes and fixes for connectivity issues appear in this table:
| Problem | Cause | Action |
|---|---|---|
| Switch offline | Weak Wi-Fi signal | Move the router or switch closer |
| App shows an error | Incorrect network password | Re-enter Wi-Fi password |
| Switch not found | App not updated | Update Smart Switch App |
Lighting Flickers Or Fails
Lighting flickers or fails are common Smart Home Lighting Problems. Flickering can damage bulbs and annoy users. Causes include wiring issues, incompatible bulbs, or a poor power supply.
Follow these tips to fix lighting flickers or failures:
- Check bulb compatibility: Use bulbs recommended by the Smart Light Switch Installation guide.
- Inspect wiring: Loose or damaged wires cause flickering. Refer to the Smart Switch Wiring Guide.
- Test another bulb: Replace the bulb to rule out bulb failure.
- Check dimmer settings: Some smart switches have dimmer modes that cause flicker.
- Verify power supply: Low voltage or surges can cause light failure.
Below is a summary of flicker causes and solutions:
| Symptom | Cause | Fix |
|---|---|---|
| Light flickers | Loose wiring | Tighten connections |
| Light flickers | Incompatible bulb | Use a compatible bulb |
| The light fails to turn on | Power supply issue | Check the breaker and voltage |
Maintenance And Updates
Installing a smart light switch is just the beginning of enjoying smarter home lighting. Learning how to install a smart light switch is important, but proper maintenance and updates keep it working smoothly and safely. Regular care helps prevent problems and extends the life of your switch. Staying updated with the latest software ensures you get new features and important security fixes. Knowing when to replace your switch prevents damage or malfunctions. This section guides you through simple steps to maintain and update your smart light switch effectively.
Regular Checks
Regularly checking your smart light switch helps spot issues early. Inspect the switch monthly for any physical damage or loose parts. Look for signs such as flickering lights or unusual sounds, which might indicate wiring problems. Check the wall plate to ensure it is secure and not cracked.
- Verify the switch responds correctly to both manual and app controls.
- Test the connection to your home Wi-Fi network.
- Make sure the switch’s indicator lights show normal operation.
Keep a simple checklist like the one below to track your inspections:
| Check Item | What to Look For | Action Needed |
|---|---|---|
| Physical Condition | Cracks, loose screws, discoloration | Tighten or replace if damaged |
| Functionality | Switch responds to app and manual use | Reset or troubleshoot the connection |
| Wi-Fi Connection | Stable and strong signal | Move the router or switch for better signal |
Regular checks prevent small problems from becoming costly repairs. They keep your smart switch reliable and safe.
Firmware Updates
Firmware controls how your smart light switch works. Updating firmware improves performance, fixes bugs, and adds new features. Most smart switches update automatically, but manual updates may sometimes be necessary.
Steps to update firmware:
- Open the Smart Switch app on your phone.
- Go to the device settings or update section.
- Check for available updates.
- Follow the on-screen instructions to install the update.
Important tips for firmware updates:
- Keep the switch powered on during updates to avoid damage.
- Connect your phone to a stable Wi-Fi network for smooth download.
- Please do not interrupt the update process once it starts.
Regular updates keep your smart light switch secure against vulnerabilities. They also ensure the device stays compatible with other smart home gadgets.
Replacing The Switch
Smart light switches last for many years but may need to be replaced due to wear or new technology. Signs that indicate replacement include:
- Switch no longer responds or frequently disconnects.
- Physical damage like cracks or broken buttons.
- Incompatibility with your home’s updated electrical system.
Steps to replace your smart light switch safely:
- Turn off the power at the circuit breaker.
- Remove the old switch carefully, noting wire connections.
- Install the new smart switch following the manufacturer’s instructions.
- Restore power and test the new switch.
Keep these safety tips in mind:
- Always cut power before handling electrical components.
- Use a voltage tester to confirm that no electricity is flowing.
- Consult a licensed electrician if unsure about installation.
Replacing the switch on time keeps your home safe and your lighting system efficient. It also allows you to enjoy the latest smart features.
Frequently Asked Questions
What Tools Do I Need To Install A Smart Light Switch?
You need a screwdriver, voltage tester, wire stripper, and electrical tape. A ladder may help reach the switch. Always turn off power before starting.
How Do I Turn Off Power Safely Before Installation?
Switch off the circuit breaker controlling the light switch. Use a voltage tester to confirm no electricity flows. Safety first to avoid electric shocks.
Can I Install A Smart Switch Without A Neutral Wire?
Most smart switches require a neutral wire for power. Some models work without it, but check compatibility. Consult product specs before buying.
How Do I Connect Wires To A Smart Light Switch?
Match the switch wires with house wires: line, load, neutral, and ground. Secure connections with wire nuts and wrap with electrical tape for safety.
Conclusion
Installing a smart light switch is simple when you follow clear steps. Learning how to install a smart light switch lets you save energy and control lights easily. Follow safety rules, use the right tools, and double-check all connections as you work. Take your time and stay careful—then enjoy the convenience of smart lighting in your home.
This small change can make daily life brighter and smarter. Feel confident trying this project yourself: a little effort brings big benefits.